
Anaglyph the 2nd:
Grayscale Images
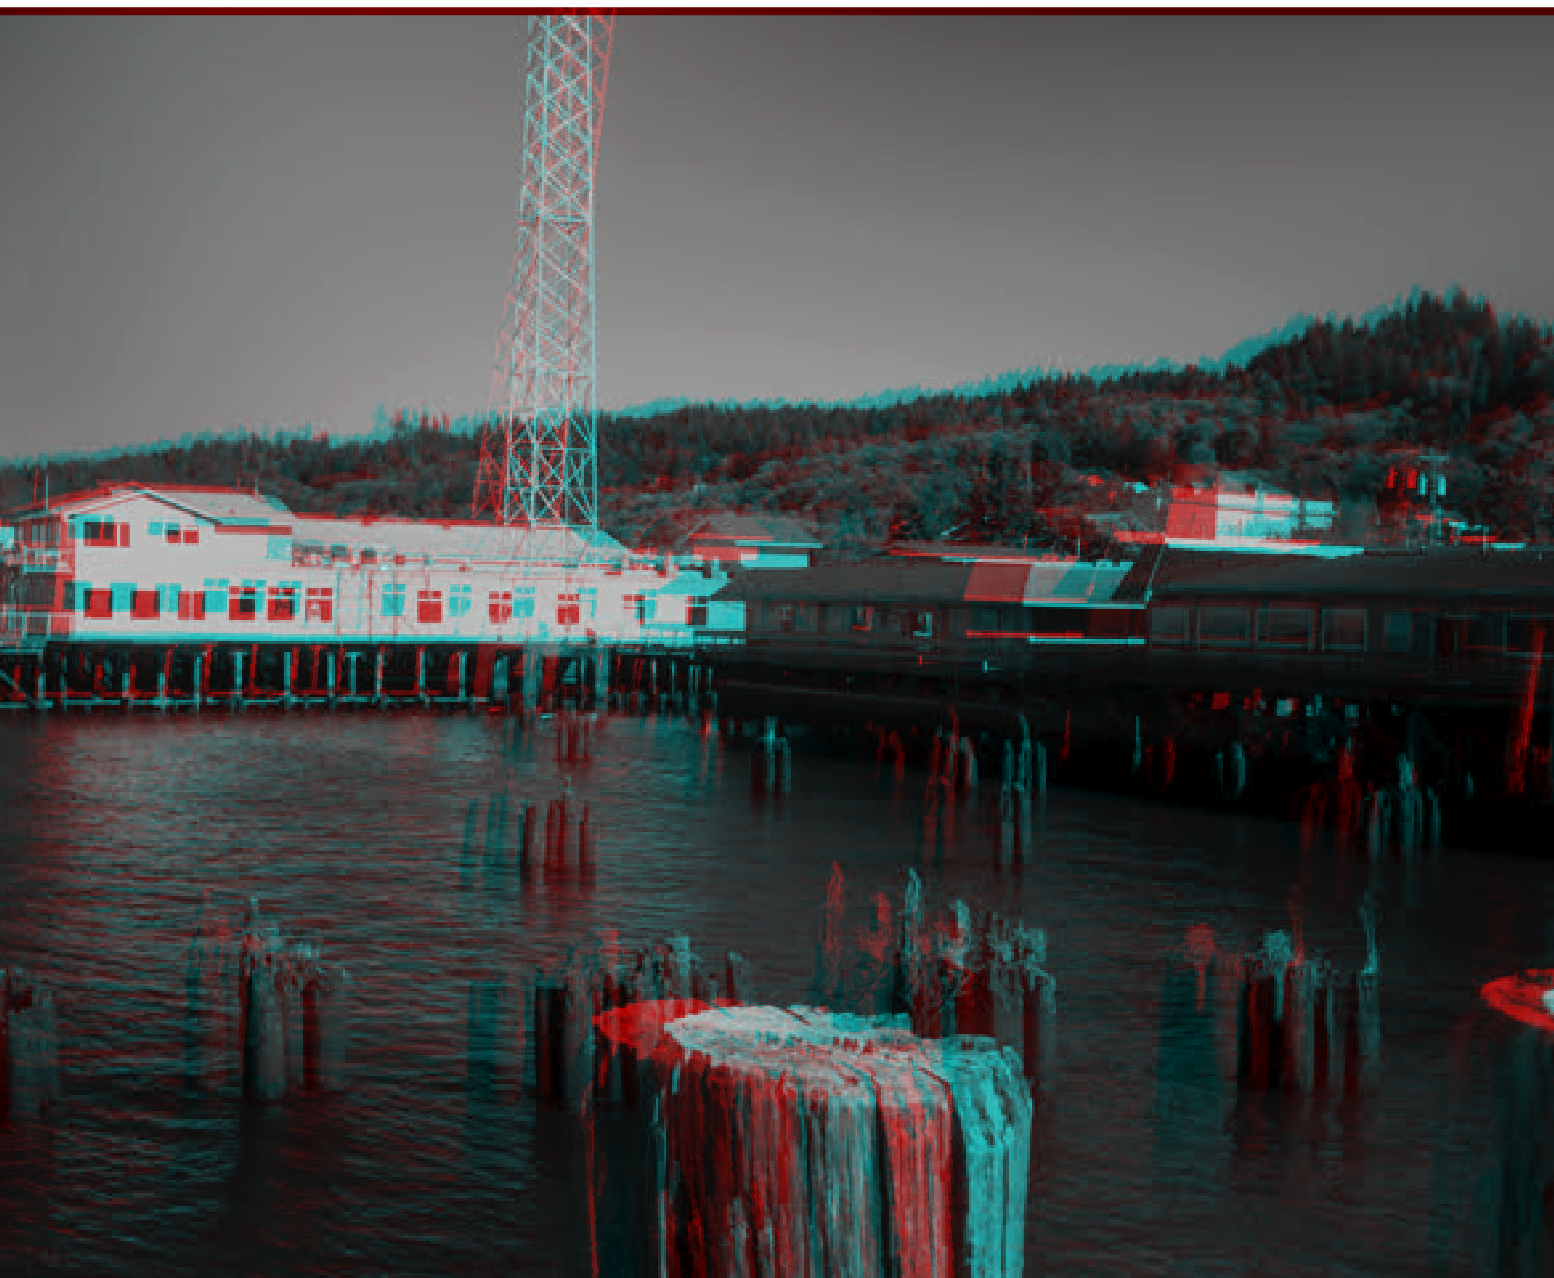
Our next step is making anaglyphs of grayscale images - which lets us start working on photographs! Of course we can work with color images as well, but I find that color can be distracting sometimes, while a grayscale image almost always lets the 3D pop. Be sure to pick images with clear subjects separated from the background - you may be disappointed if you start with crowd shots or landscapes.
We’ll expand on the line art version by creating an anaglyph from a B&W photo in Affinity Photo. In this example we’ll have to adjust the colors in the layers. This technique can be applied by almost any image editing program, but the exact steps of the process may vary between programs. The basic steps in all cases are: find the RGB color channels, make the necessary adjustments for each layer, select the appropriate blend mode, add displacement, crop unsightly edges, export and enjoy.
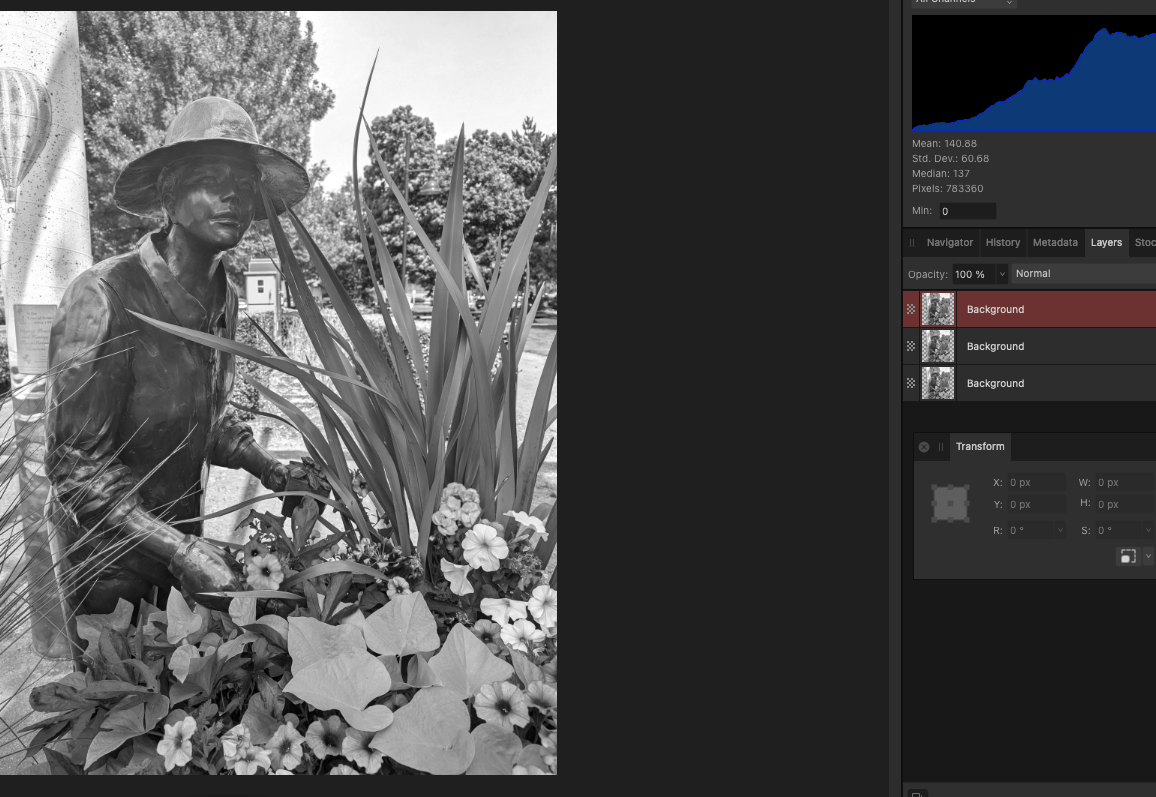
Step 1 is the same as before: take your grayscale image and make two copies. Hide and lock down the original, just in case you need to backtrack later.
In my version of Affinity Photo, I have to create an “Adjustment Layer” for the color channel selection. Hide the layer you aren’t working with, and then go to the LAYER menu, NEW ADJUSTMENT LAYER, and select “Channel Mixer.” In Photoshop or Figma, these exact steps may be slightly different.

Take the red layer and scooch it a bit to the left. You will see a red stripe on one side and cyan on the other, plan to crop those off. When you’re happy with the offset, merge the two layers and crop the unsightly edges off. Export as an image file (PNG, JPG, etc) and enjoy!
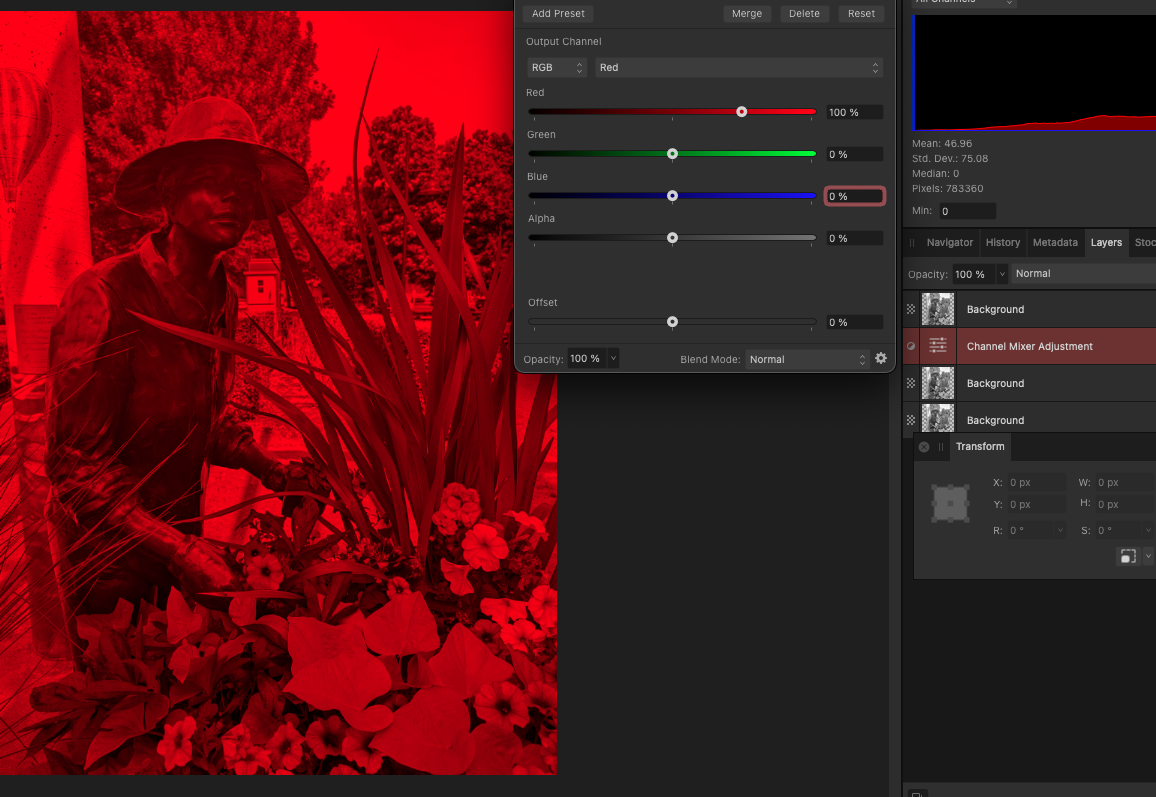
Your channel options should be either RGB or CYMK, or you might be able to select which you like. It doesn’t matter, use the color space you’re comfortable with.
In either case you should see each channel and THEN RGB or CYMK sliders for each channel. Move deliberately here, it’s easy to get mixed up. To make this layer red, I want to set the RED slider in the RED channel to 100% and all others to zero. Then I need to go to the GREEN channel and set EVERYTHING to 0. Then to the BLUE channel to set everything to 0.
For the CYAN layer, I go to the RED channel and set everything to zero. Then I go to the GREEN channel and set Green to 100% and everything else to 0, then to the BLUE channel to set BLUE to 100% and everything else to 0.
If working in the CYMK space, same idea but Cyan is the easy one, and red is the combination of yellow and magenta.
Once one layer is Red and the other Cyan, merge adjustment and base layers if necessary. You should end up with two visible layers, one cyan and one red.
Take the top layer and set the blend mode to Multiply.
